If you run a coding club or want to host your own programming contest, DomJudge is the tool for it. It is the same judge used in ICPC contests around the world.
In this post, I will show you how to set it up on your own computer using Docker. I will also show you two problems I faced (port conflicts and cgroups) and how I fixed them.
This guide is based on my own setup on Arch Linux. I also used this blog as a starting reference: Setting up DomJudge with Docker
What is DomJudge?
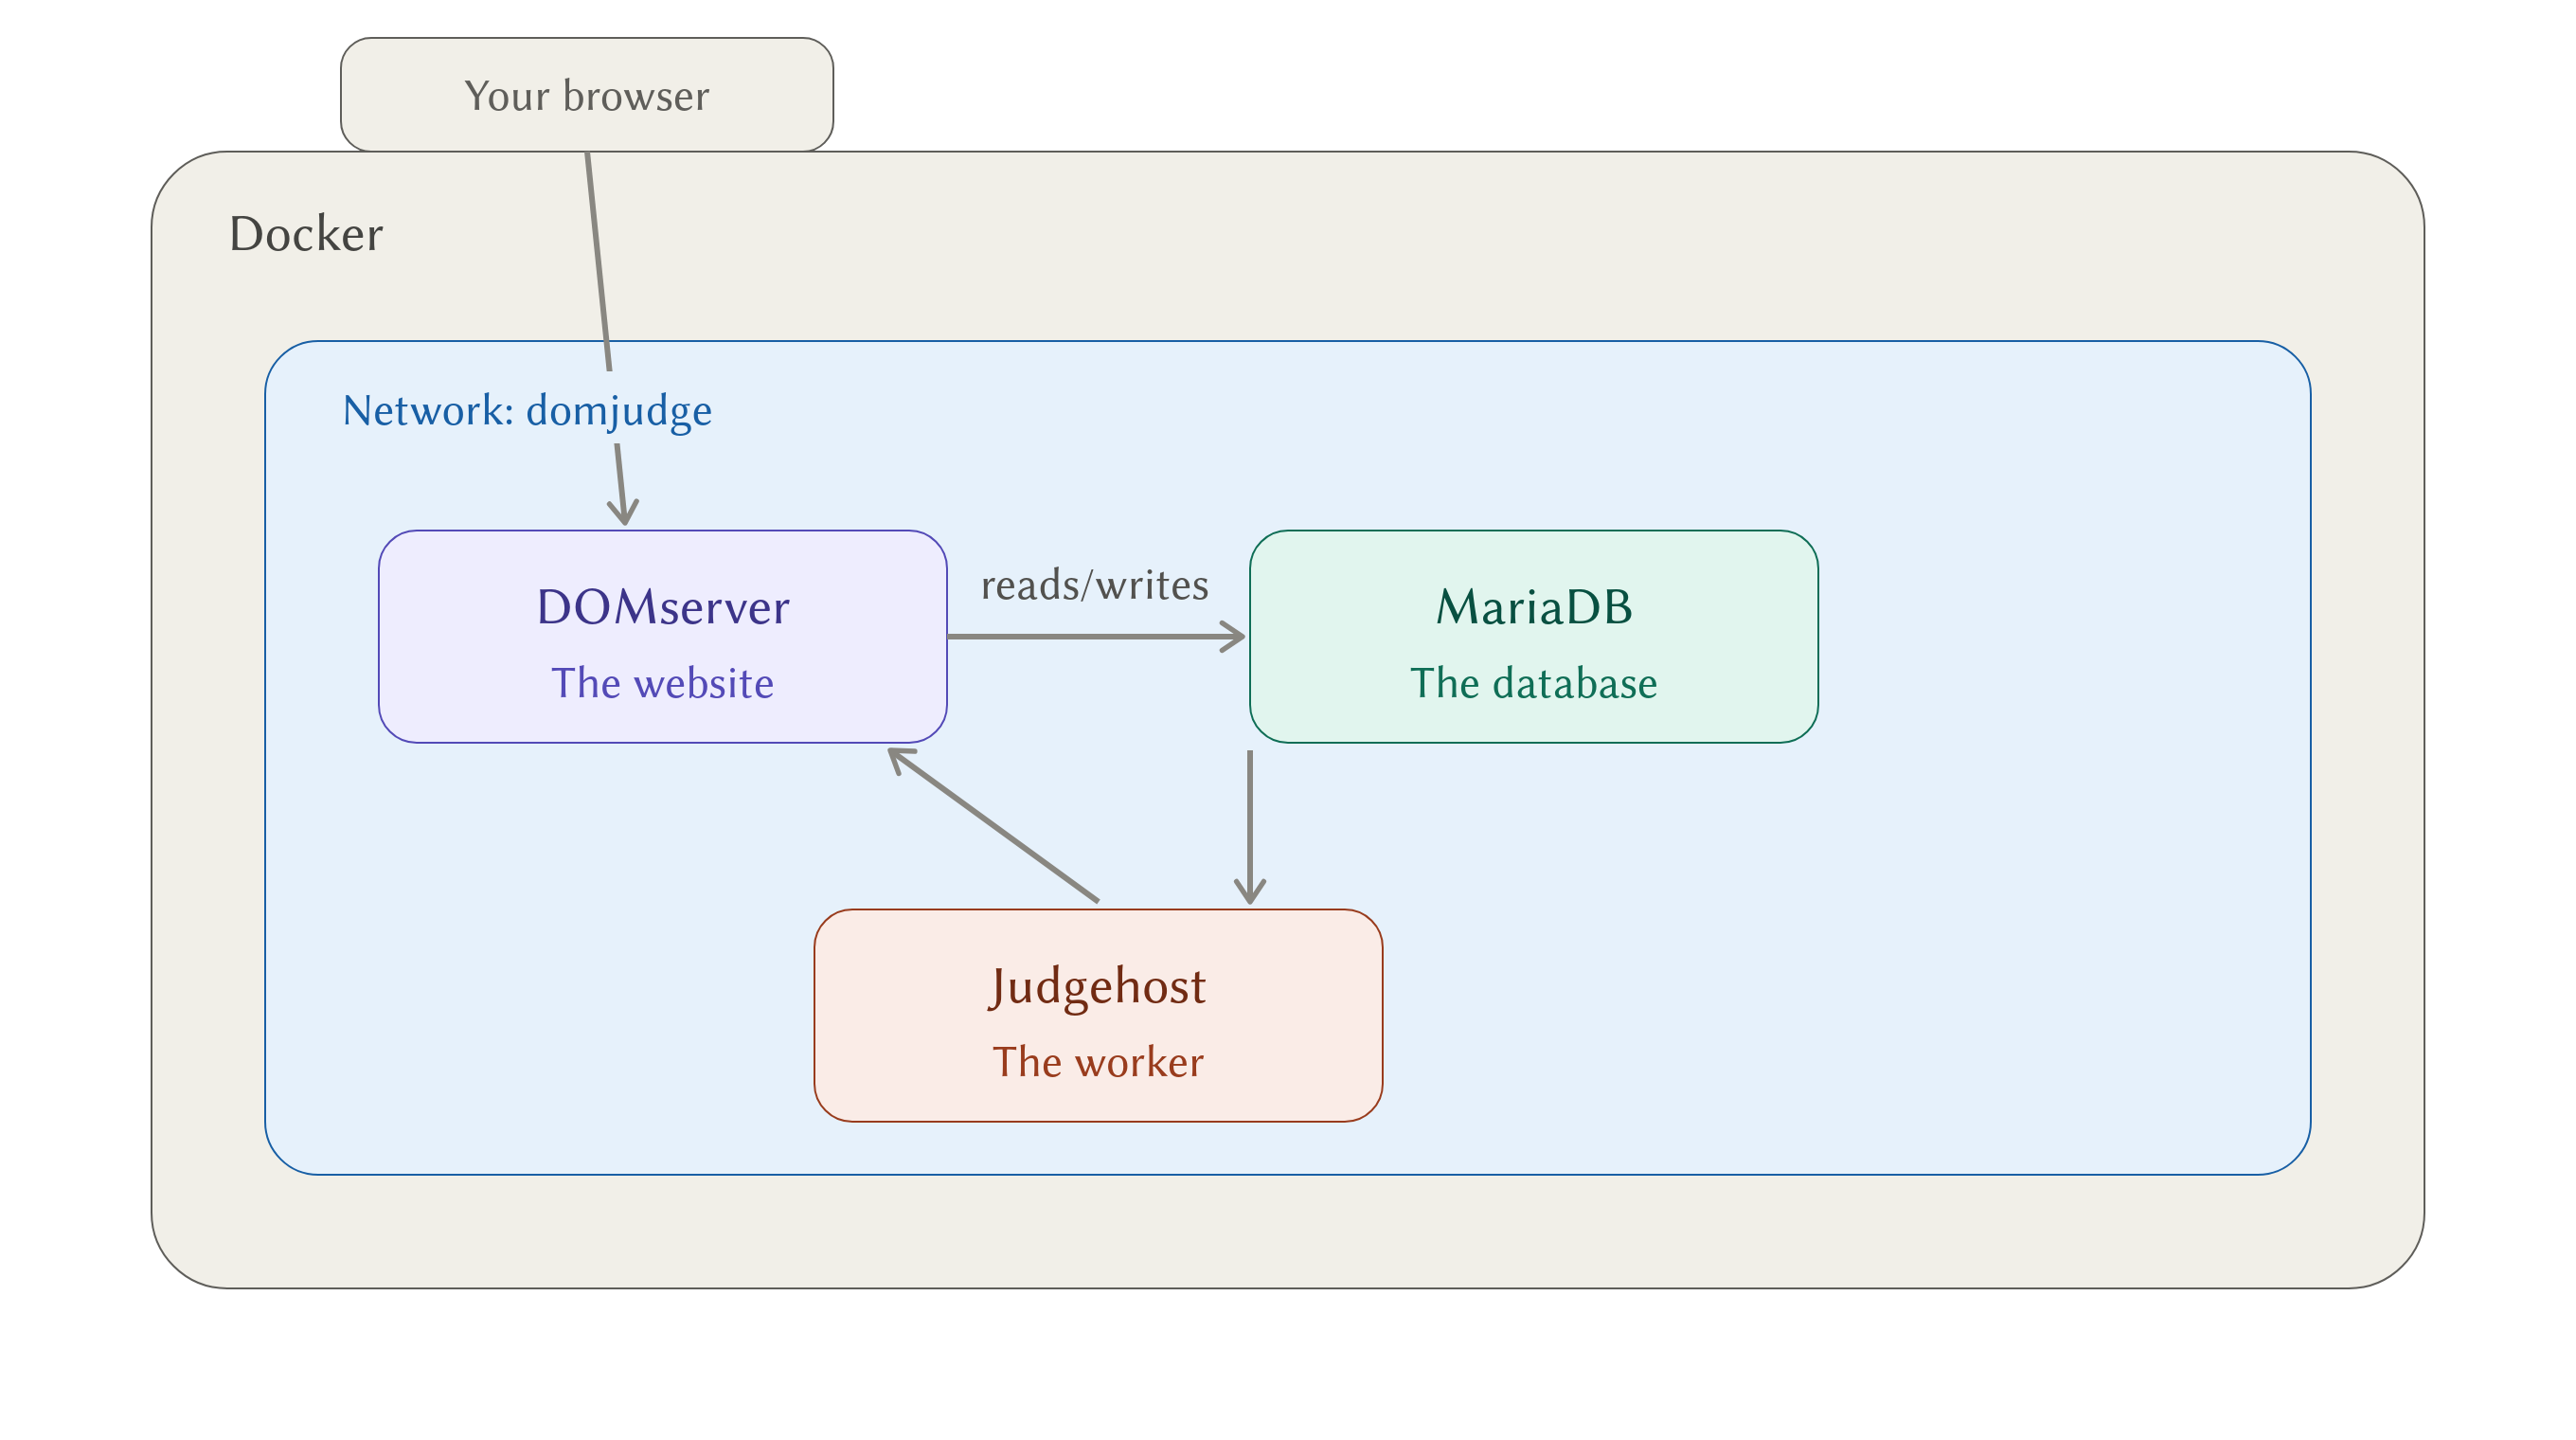
DomJudge has three parts. Think of them as three separate workers that talk to each other:
- DOMserver – This is the website. You open this in your browser to see problems, submit code, and check the scoreboard.
- MariaDB – This is the database. It stores teams, problems, and results.
- Judgehost – This is the worker that actually runs the code. When someone submits a solution, the judgehost compiles it, runs it, and checks if the answer is correct.
All three run in Docker containers. Docker just means each part runs in its own small isolated box on your computer, but they can still talk to each other.
Before You Start: Install Docker and Docker Compose
If you already have Docker and Docker Compose installed, you can skip this part. If not, pick the section below that matches your system. I’ll cover both Ubuntu and Arch Linux, since those are the two most common choices for this kind of setup.
Installing Docker on Ubuntu
The easiest way is to use Docker’s own official install script. It works on any Ubuntu version and sets up everything correctly for you.
curl -fsSL https://get.docker.com | sudo sh
What this does: curl -fsSL <link> downloads the official Docker install script from Docker’s own website, and | sudo sh pipes that script straight into your shell to run it with admin rights. This one command installs Docker completely, you don’t need to add repositories or keys by hand.
Once it finishes, check that it installed properly:
docker --version
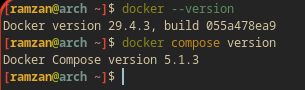
You should see something like Docker version 29.x.x or higher. If you see a version number, Docker is installed correctly.
Installing Docker Compose on Ubuntu
Newer versions of Docker already include Compose as a plugin, so check first before installing anything extra:
docker compose version
Notice this is docker compose with a space, not docker-compose with a hyphen. If this command prints a version number like Docker Compose version 5.x.x, you already have it, and you can skip the install step below.
If it says “command not found,” install the Compose plugin like this:
sudo apt update
sudo apt install docker-compose-plugin
Line by line:
sudo apt updaterefreshes Ubuntu’s list of available packages, so it knows about the latest versions.sudo apt install docker-compose-plugininstalls the Compose plugin itself.
Check again to confirm it worked:
docker compose version
Installing Docker on Arch Linux
On Arch, Docker comes straight from the official repositories, so you don’t need any extra script. Just use pacman:
sudo pacman -Syu docker docker-compose
Line by line:
sudo pacman -Syuupdates your whole system first, which is good practice before installing anything new on Arch.docker docker-composeinstalls both Docker itself and the Compose plugin in one go.
Or if you use an AUR helper like yay or paru instead of pacman, that works too, though it’s not needed here since Docker is in Arch’s official repos:
yay -S docker docker-compose
Once it finishes, check the versions:
docker --version
docker compose version
You should see version numbers printed for both. If docker compose version doesn’t work, try docker-compose --version instead, since some Arch setups still use the older standalone binary with a hyphen.
Make Sure Docker Is Actually Running
This step is the same on both Ubuntu and Arch. Docker sometimes installs fine but the background service isn’t turned on yet. Check with:
sudo systemctl status docker
If it’s not active, start it and make it launch automatically on every boot:
sudo systemctl start docker
sudo systemctl enable docker
A note about sudo: Throughout this guide, every Docker command starts with sudo. This is on purpose. You can add your own user to the docker group so you don’t need to type sudo every time, but doing that gives your regular user almost the same power as root on your machine. For a contest server, it’s safer to just keep typing sudo.
If you do want to skip typing sudo every time anyway, here is how, and this works the same on both Ubuntu and Arch:
sudo usermod -aG docker $USER
After running this, log out and log back in (or restart your terminal) for the change to apply.
Before You Start: Check Your Cgroup Version
This part confuses almost everyone the first time, so pay attention here.
Judgehost needs something called a “cgroup” to control how much memory and CPU a submitted program can use, and to stop it from cheating (like accessing the internet). There are two versions of cgroups: v1 and v2. The commands are different for each.
Check which one you have:
stat -fc %T /sys/fs/cgroup
If it prints cgroup2fs, you are using cgroup v2. Then jump to Step 1 because almost every modern Linux system today (Arch, new Ubuntu) uses v2. This guide only covers v2, since that is what most people have now.
If you are on cgroup v1, don’t worry. You can still make it work, you just need one extra step before starting Docker. Here is exactly what to do.
What To Do If You Have Cgroup v1
First, check your kernel version, since cgroup v2 needs kernel 5.19 or newer to work properly:
uname -r
If your kernel is older than 5.19, or your stat -fc %T /sys/fs/cgroup command printed something other than cgroup2fs (like tmpfs), you are on cgroup v1. To fix this, you need to add a few settings to GRUB, which is the program that starts your Linux system when you boot it.
Step A: Look at your current GRUB settings
cat /etc/default/grub | grep GRUB_CMDLINE_LINUX_DEFAULT
This will show you a line that looks something like this:
GRUB_CMDLINE_LINUX_DEFAULT="quiet splash"
Step B: Add cgroup settings to that same line
You need to add three settings to the end of that line, inside the quotes. Do not delete what is already there, just add to it. So the line above would become:
GRUB_CMDLINE_LINUX_DEFAULT="quiet splash cgroup_enable=memory swapaccount=1 systemd.unified_cgroup_hierarchy=0"
Open the file and edit it:
sudo nvim /etc/default/grub
Find that same line, add the three settings at the end (still inside the quotes), then save and close the file.
Step C: Update GRUB(Ubuntu)
sudo update-grub
Step D: Update GRUB(Arch Linux)
sudo grub-mkconfig -o /boot/grub/grub.cfg
Step E: Reboot
sudo reboot
Your computer needs to restart for these boot settings to actually apply. This will not work without a reboot.
Step F: Check that it worked
After your computer turns back on, run:
cat /proc/cmdline
You should now see cgroup_enable=memory, swapaccount=1, and systemd.unified_cgroup_hierarchy=0 somewhere in that output. If you see them, you’re all set.
One important difference for later: when you get to the judgehost setup step further down, cgroup v1 does not need the
--cgroupns=hostflag. Just use--privilegedand the cgroup folder mount, and skip that one flag. Everything else in this guide stays exactly the same.
This is a one-time setup. Once GRUB is configured, it stays that way through every future reboot. You will not need to repeat this unless you reinstall your operating system or switch to a different kernel.
If you already have cgroup v2 working, you can skip all of this and go straight to the next step.
Step 1: Clean Up Anything Old
If you tried this before and want a fresh start, remove any old containers first:
sudo docker stop domserver mariadb judgehost-0 judgehost-1 2>/dev/null
sudo docker rm domserver mariadb judgehost-0 judgehost-1 2>/dev/null
sudo docker network rm domjudge 2>/dev/null
What this does, line by line:
docker stop <name>turns off a running container, like turning off a machine.docker rm <name>deletes that container completely.docker network rm domjudgedeletes the private network these containers use to talk to each other.- The
2>/dev/nullpart at the end just hides error messages if the container did not exist in the first place. It keeps your screen clean.
Step 2: Check Nothing Is Already Using Your Ports
Before starting anything new, check if any other program is already using port 80 or 8000 on your computer:
sudo ss -tulnp | grep -E ':80|:8000|:13306'
This command shows you every program that is listening on a network port right now, and we filter it to just show ports 80, 8000, and 13306.
My Own Problem: Port 80 Conflict with XAMPP
Here is exactly what happened to me. I had DomJudge working before. Then I needed XAMPP for a university project, so I removed my DomJudge containers to free up port 80 for XAMPP.
When I brought DomJudge back later, http://localhost on port 80 kept spinning and never loaded. Running docker ps showed the domserver container as unhealthy.
The reason: XAMPP was already using port 80 (I had moved it to port 1978 for my own case, but the same idea applies to any two programs fighting over one port). Two different programs cannot use the same port on the same computer at the same time.
The fix is simple: give each program its own port. I kept XAMPP on port 1978, and moved DomJudge to port 8000. Once they were on different ports, everything worked at the same time with zero problems.

Step 3: Create a Network for the Containers
sudo docker network create domjudge
This makes a private network called domjudge. Any container that joins this network can find and talk to any other container on it, just by using its name. This is important, because later, DOMserver will talk to MariaDB using the name mariadb, not an IP address.
Step 4: Start the Database (MariaDB)
sudo docker run -d \
    --name mariadb \
    --network domjudge \
    -p 13306:3306 \
    -v mariadb-data:/var/lib/mysql \
    -e MYSQL_ROOT_PASSWORD=rootpw \
    -e MYSQL_USER=domjudge \
    -e MYSQL_PASSWORD=djpw \
    -e MYSQL_DATABASE=domjudge \
    --restart unless-stopped \
    mariadb:10.11 \
    --max-connections=1000 --innodb_snapshot_isolation=OFF
Let’s go through every single part of this command, because it looks big but each piece is simple:
-dmeans run this in the background, so it does not take over your terminal window.--name mariadbgives this container the name “mariadb”. We will use this exact name later.--network domjudgeputs it on the private network we made in Step 3.-p 13306:3306makes port 3306 inside the container available as port 13306 on your own computer. This is optional. It just lets you connect to the database from outside Docker if you ever want to check it directly.-v mariadb-data:/var/lib/mysqlsaves the database files outside the container, in something called a volume. This matters a lot: if you ever delete this container, your data (teams, problems, submissions) will still be safe, because it lives in this volume, not inside the container itself.- The three lines starting with
-e MYSQL_set the database name, username, and password. Remember these exact values, because DOMserver will need the same ones in the next step to connect. --restart unless-stoppedtells Docker to automatically start this container again if your computer restarts, unless you stopped it yourself on purpose.--max-connections=1000and--innodb_snapshot_isolation=OFFare settings that help MariaDB handle many judgehosts writing results at the same time during a real contest, without crashing or freezing.
Sleep
sleep 20
sudo docker logs mariadb 2>&1 | tail -5
You are looking for a line that says something like ready for connections. If you don’t see it yet, wait a little longer and check again.

Step 5: Start the Website (DOMserver)
sudo docker run -d \
    --name domserver \
    --network domjudge \
    -p 8000:80 \
    -e CONTAINER_TIMEZONE=Asia/Karachi \
    -e MYSQL_HOST=mariadb \
    -e MYSQL_USER=domjudge \
    -e MYSQL_PASSWORD=djpw \
    -e MYSQL_DATABASE=domjudge \
    -e MYSQL_ROOT_PASSWORD=rootpw \
    --restart unless-stopped \
    domjudge/domserver:8.3.1
New things here compared to the last command:
-p 8000:80is the port fix from earlier. Port 8000 on your computer connects to port 80 inside the container. This is what lets DomJudge and XAMPP live together peacefully, since they are no longer using the same port.-e MYSQL_HOST=mariadbis important to understand. This is not an IP address, it is just the container name we gave MariaDB in Step 4. Because both containers are on the samedomjudgenetwork, Docker automatically knows how to find “mariadb” by name.CONTAINER_TIMEZONE=Asia/Karachisets the timezone. If you skip this or set it wrong, your contest clock and timers will be off by several hours, which is a real problem during a live contest.
If you’re using 8000 as a port to any other service in your machine, then you can change this(DOMserver) port from 8000 to something else that is not in use.
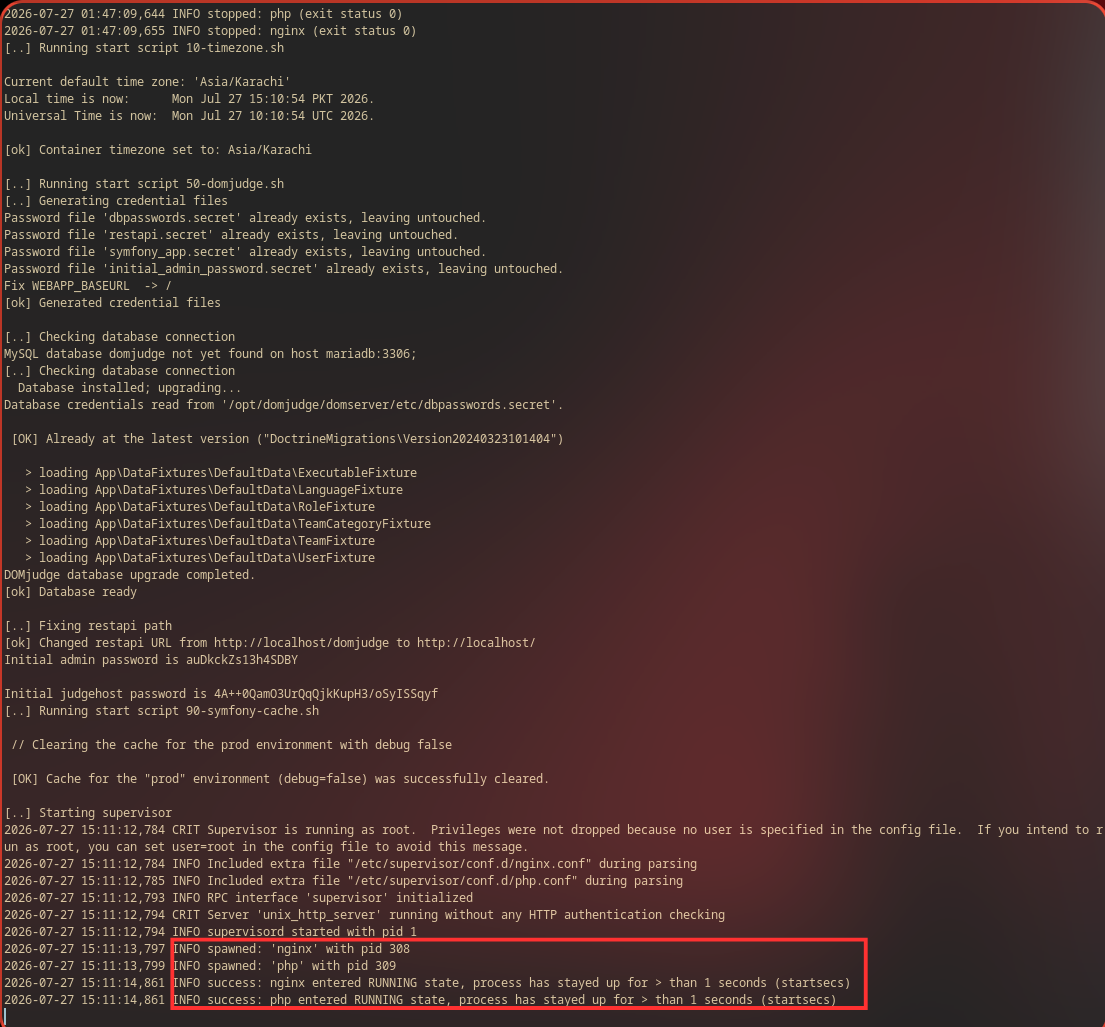
The very first time you start this, it needs 30 to 90 seconds to set itself up completely. Watch what it’s doing:
sudo docker logs -f domserver
The -f means “follow,” so it keeps showing you new lines as they happen instead of just stopping. Wait until you stop seeing new setup messages or see the nginx and php entered RUNNIG state, then press Ctrl+C to stop watching (this only stops you from watching, the container keeps running).
Step 6: Get Your Passwords
DomJudge automatically creates two passwords for you when it sets up. You need both.
Admin password, to log into the website:
sudo docker exec domserver cat /opt/domjudge/domserver/etc/initial_admin_password.secret
This command goes inside the running domserver container and prints out a file that has your admin password in it.
Judgehost password, needed for the next step:
JUDGE_PASS=$(sudo docker exec domserver cat /opt/domjudge/domserver/etc/restapi.secret | grep -v '^#' | tail -1 | awk '{print $4}')
This one looks complicated, but it is just four small steps joined together:
- Print the secrets file from inside the container.
grep -v '^#'removes any line that starts with#, since those are just comments, not real data.tail -1keeps only the last line left over.awk '{print $4}'splits that line into pieces by space, and grabs the 4th piece, which is the actual password.
The whole result gets saved into something called JUDGE_PASS, so we can reuse it right away in the next command without typing it out.
Step 7: Start the Worker (Judgehost)
sudo docker run -d \
    --name judgehost-0 \
    --network domjudge \
    --privileged \
    --cgroupns=host \
    --hostname judgehost \
    -v /sys/fs/cgroup:/sys/fs/cgroup \
    -e DAEMON_ID=0 \
    -e CONTAINER_TIMEZONE=Asia/Karachi \
    -e DOMSERVER_BASEURL=http://domserver/ \
    -e JUDGEDAEMON_PASSWORD=$JUDGE_PASS \
    --restart unless-stopped \
    domjudge/judgehost:latest
Quick reminder if you are on cgroup v1: remove the --cgroupns=host line from the command below. Everything else stays the same.
This is the part where cgroups matter, so let’s break it down carefully:
--privilegedgives this container extra permission on your computer. The judgehost needs this to safely run and sandbox code that other people submitted, since that code cannot be trusted.--cgroupns=hostis the cgroup v2 setting we talked about earlier. If you skip this, your judgehost container will keep crashing and restarting in a loop.-v /sys/fs/cgroup:/sys/fs/cgroupshares your computer’s real cgroup system with the container, so it has something real to actually work with.-e DAEMON_ID=0just gives this worker a unique number. If you add a second judgehost later (for example to use a second CPU core), that one would useDAEMON_ID=1.-e DOMSERVER_BASEURL=http://domserver/again uses the container name, not an IP address, same idea as before.-e JUDGEDAEMON_PASSWORD=$JUDGE_PASSplugs in the password we saved in Step 6.
Check if it’s running properly:
sudo docker ps --filter "name=judgehost" --format "table {{.Names}}\t{{.Status}}"
If it keeps restarting over and over, the most common reason is a cgroup problem. Check its logs to see the actual error:
sudo docker logs judgehost-0
If you see anything about cgroups in the error message, go back and double check your cgroup version and the --cgroupns=host flag.
Step 8: Log In and Explore
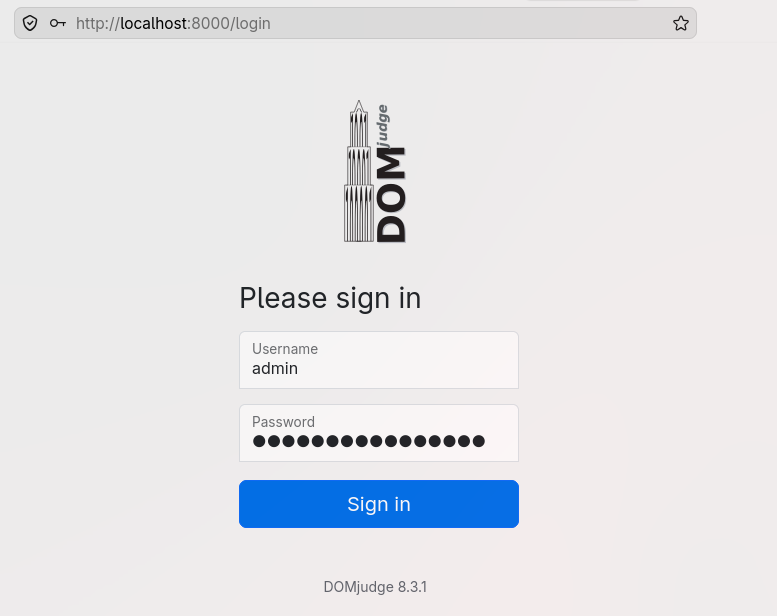
Open your browser and go to:
http://localhost:8000
if you’re using other port, then replace it with 8000 in the url
Username: admin
Password: whatever Step 6(admin password) printed for you.
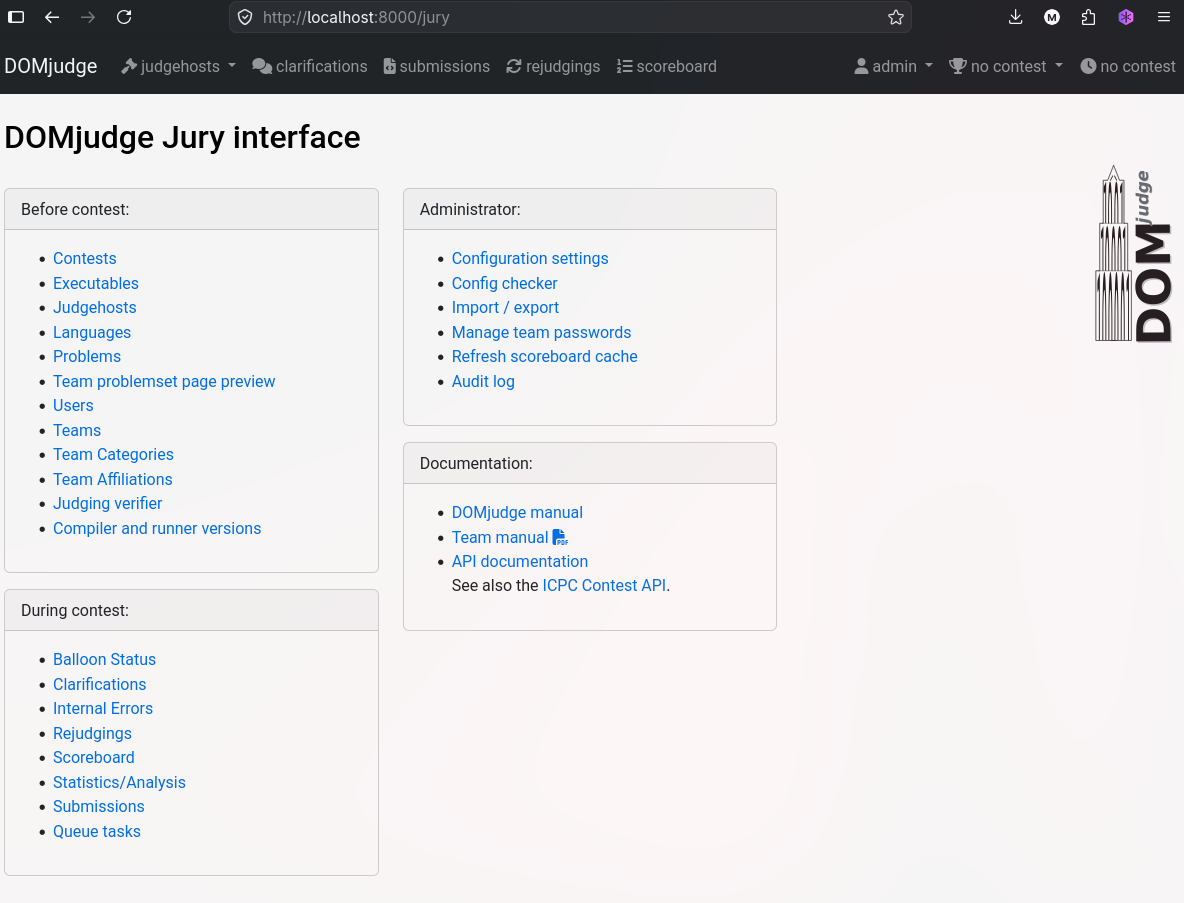
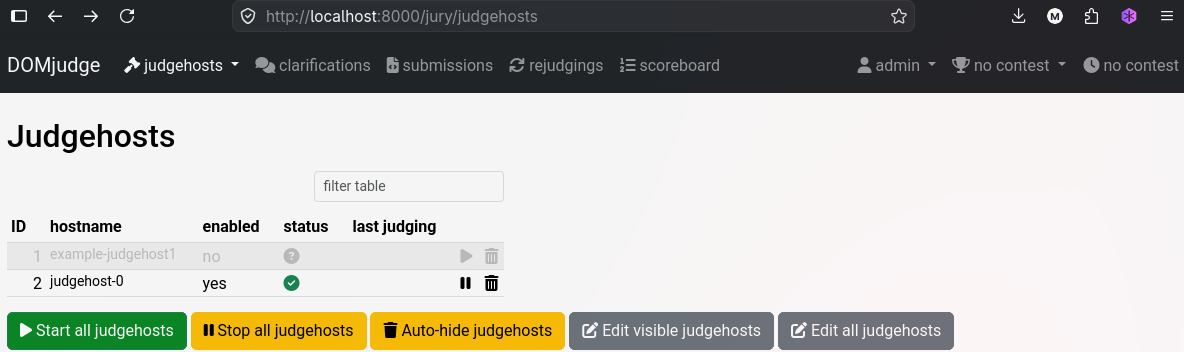
Once inside, click on Judgehosts in the menu. You should see judgehost-0 listed with a green mark, which means it’s alive and ready to judge submissions.
Adding another judgehosts
Each judgehost will run on single core. If you want to add more judgehosts then repeat the Step 7 and name judgehost as judgehost-1 or other that is not used and confirm it by logging in using Step 8 that this new judgehost is running.
Stop and Start the server
If you want to stop it when you’re not using it. Then:
sudo docker stop domserver mariadb judgehost-0 # Stop DomJudge (keeps data)
If you want to start DomJudge again:
sudo docker start mariadb && sleep 20 && sudo docker start domserver && sleep 60 && sudo docker start judgehost-0
Starting Over from Scratch
If you want to delete everything and set it all up again from the beginning, for example to practice, use these commands:
sudo docker stop domserver mariadb judgehost-0
sudo docker rm domserver mariadb judgehost-0
sudo docker network rm domjudge
sudo docker volume rm mariadb-data  # be careful here if you have data
Be careful with the last line. It deletes your database completely, including all teams, problems, and submissions. Skip that last line if you just want to restart the containers without losing your data.
Next Part of this blog
In next blog, I will cover how to run and host your first contest on DomJudge. Click here